Install Your Own SPC Flooring: Easy and Accurate Steps

Bookworms, read our SPC floating floor installation guide to bring the story to life.
Read our SPC floating floor installation guide.
What You'll Need:
- SPC flooring
- Underlayment
- Rake
- X-pattern
- Ceiling guide
- Laminate saw
- Hammer
- Tapping block
- Expansion gap spacers


Step 1: Prepare the Subfloor
- Remove any existing flooring and sweep the subfloor. Sand any uneven areas.
- Use a moisture meter to ensure the subfloor is below 12%.
- Lay the underlayment horizontally, taping the seams together.


Step 2: Plan the Installation
- Decide whether you want to start the first row with a full panel or a half panel.
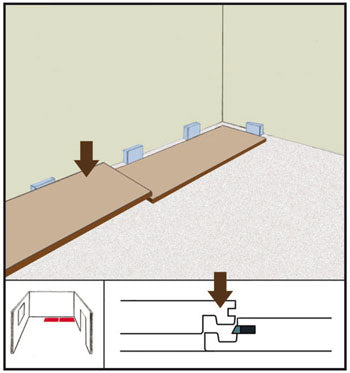
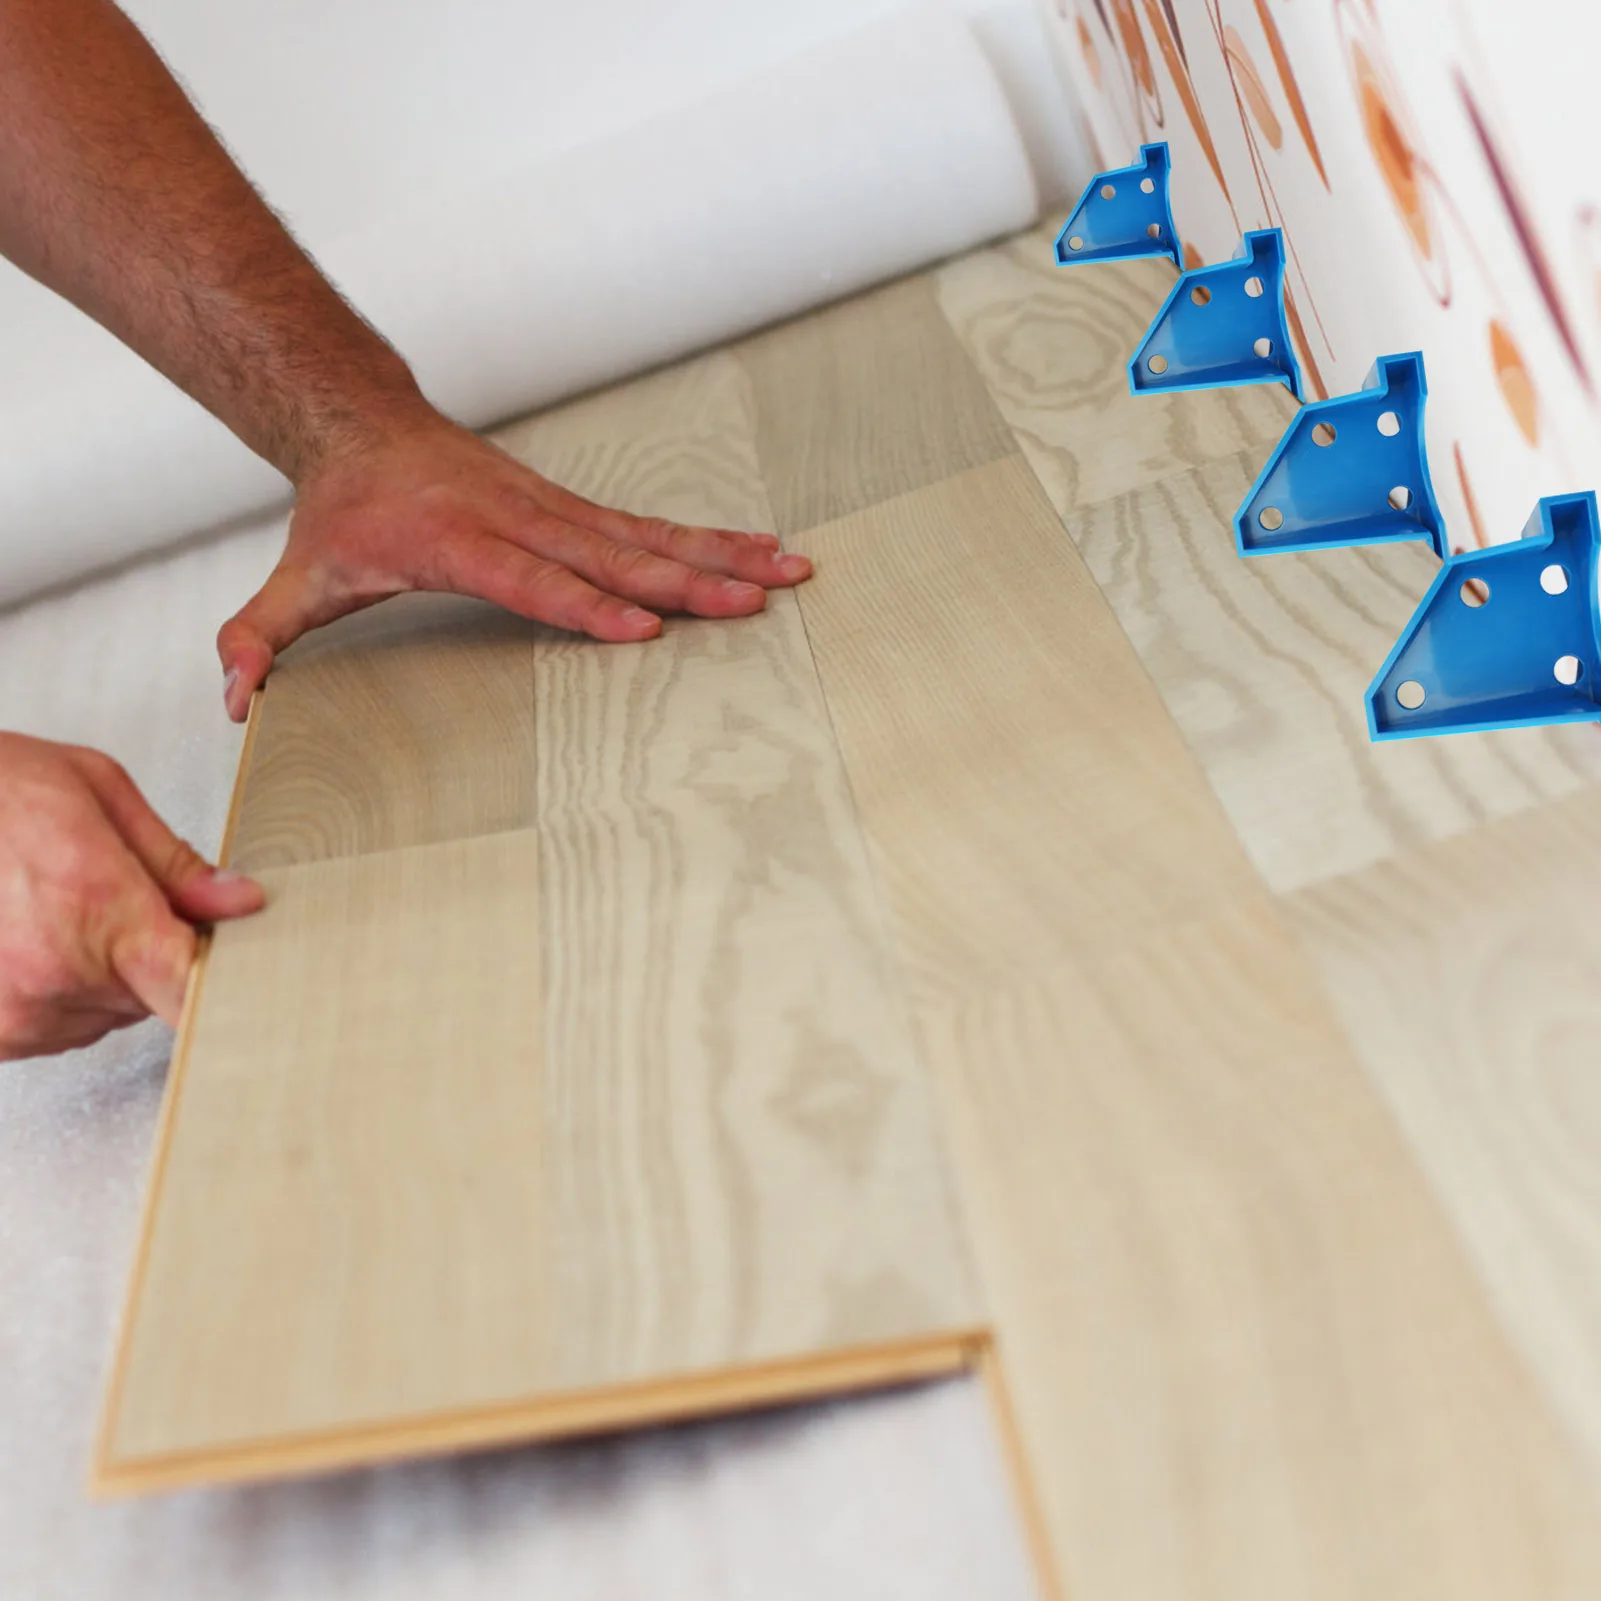
- Place expansion gap spacers 3/8-inch away from the walls.

Step 3: Create the First Row
- Use the X-pattern to mark and cut the short end of the first panel.
- Follow the same process on the long end to prepare the first panel.
- Place the panel against the wall and use the tapping block to secure it in place.


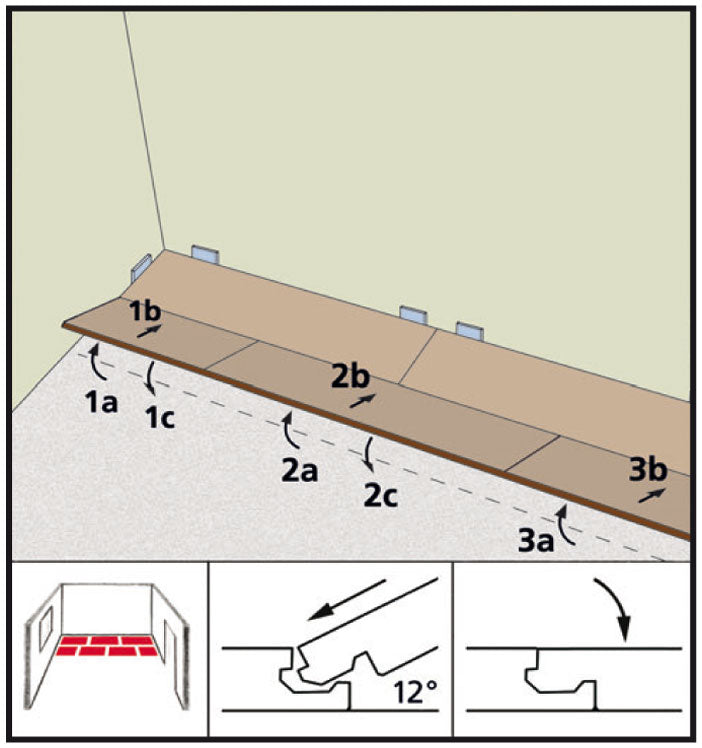
Step 4: Install the Remaining Rows
- Cut the first panel of the second row to half the length of the first row.
- Use the template to align the elements the first panel in place.
- Place the second panel of the second row, with the tongue end facing the short end of the first panel.
- Secure it in place with the tapping block and continue installing the remaining panels in the same way.


Step 5: Create Expansion Gaps
- Leave 3/8-inch of space between the panels and any fixed objects.
- Use the expansion gap spacers to provide this space.


Step 6: Finish the Installation
- Cut and install the last row, just like the first row.
- The next step is to install the baseboards.

Additional Tips:
- Use a laminate saw for all cutting.
- In tight areas, you can use a template instead of the X-pattern.
- Make appropriate cuts around pipes.
- Adjust the door thresholds to match the floor height.
